Indian Facelift Massage
Self Face-lift Massage:
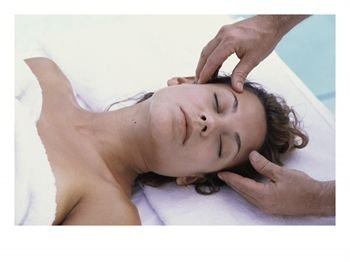
Your skin type, build and skin imbalance will determine whether lines or sagging will be more of a problem as your skin ages. Generally, if you’re thin and have dry skin you’re more likely to develop wrinkles, a problem that besets many dry skinned people. People with Oily skin are more likely to put on weight. This can bring beauty benefits, but the downside is that extra flesh starts to sag, causing a jowly effect. Anyone having a combination skin type could encounter any of these problems. So the best treatment aims to keep them all at bay.
Marma Point Facial Massage:
A 30-minute daily marma-point massage will slow down the effects of time on your face. In Ayurvedic terms you’re encouraging the movement of prana, the life force; Western science explains it as releasing muscle stiffness and increasing blood circulation. Sit with your back straight but not arched. It’s useful to have a table to lean your elbows on, and to use a mirror to check the positions of your fingers, but close your eyes when you don’t need to look. Before starting, massage your shoulders, neck and head for a few minutes: tension in these neighbouring muscles creates tension in your face.

1.Begin by working on the Third Eye point, slightly above the bridge of your nose. Feel for a slight indentation, which is often the sign of an important marma point. Apply firm pressure for a count of 7 as you breathe out, then reduce to light pressure for 5, breathing in. Repeat 3 times.
Throughout the massage you can either continue the 7-5-7-5-7-5 pressure used in step 1, or simply press once for a count of 7. Either way, press slowly and firmly, pressing inwards against the bone, not upwards or downwards unless specified. You can also vary the direct touch with small circling movements, maintaining the pressure and moving the skin over the bone.

2.Find the point in each eyebrow directly above the centre of the eye, and visualize a line from there up into your hair. Following this line, press your ring finger into the eyebrow point, the index finger into the hairline, and the middle finger between them.
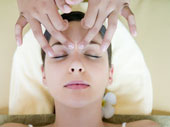
3.Feel for the upper edges of the eye sockets and press firmly with the thumbs. Be careful to press the bone, without letting your thumbs slip into your eyes or eye sockets. Lift your thumbs, move them just above the eye sockets and press again, pushing upwards so that your forehead furrows.
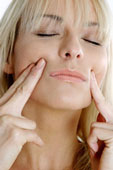
4.Place the tips of your index fingers on your cheek bones, with your other fingertips vertically below them or under the center of each eye, and apply firm pressure.
5.Find a point directly below each cheekbone, still in line with the center of your eyes. Press inwards and upwards into the bottom of the cheekbone.

6.Put the flat of each ring finger on the outer edge of each eye socket, and spread the other fingers out along a diagonal line to the edge of the ear. Press the fingers firmly.
7.Find a point at the outer edge of each nostril and press diagonally inwards with your third fingers, while your index and middle fingers press inwards and upwards below the cheekbones.
8.Bunch all fingertips close together and press along the space between your top lip and your nose – an area containing numerous marma points. Do the same below your lower lip.
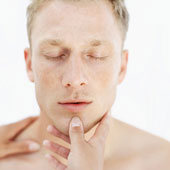
9.Press one thumbtip into the centre of your chin.
10.If you like, pour a little oil or cream suitable for your skin type onto your hands. Bring your hands down the centre of your face, barely touching it, until the heels of your hands are under your chin. Now lightly stroke your fingertips out to the side across the cheekbones, without rubbing the fine skin directly beneath the eyes. Then bring the hands, with a firmer stroke, up the sides of the face. Repeat two or three times. Cup your hands over your closed eyes for several breaths.
11.Place your fingertips flat on your forehead, then stroke lightly towards the right ear. Repeat on the left. Stroke in both directions several times. If there’s any feeling of drag, apply more oil to your skin. Continue the movement into your hair.
12.Massage your head. Lightly pull sections of your hair, making your scalp move in circles over your skull. Finish by combing with your fingertips in long movements to the ends of the hair.